
Amarel
Terminal Basics
A terminal is an essential platform for programmers. While IDEs are familiar and useful, a terminal is often more convenient for working with remote clusters.
You can also connect to a remote cluster with other applications, including Visual Studio Code, PyCharm, Atom, and Cursor. Find the tools that feel most comfortable for your workflow.
Getting A Terminal
Depending on your operating system, there are different choices for a terminal.
Linux And MacOS
A terminal is natively supported and usually already installed. If not, look for the terminal application through your system app store or software manager.
Windows
Install Windows Subsystem for Linux following the Microsoft WSL installation instructions.
Working With A Terminal
In a terminal, you type commands into the command line. There are slight differences between operating systems, but most common commands are shared across Linux, macOS, and WSL.
For a starter list, see Common Terminal Commands.
Shell Startup Files
Each time you start a terminal, your shell settings are initialized from a startup file. The file depends on which shell you use.
For many Linux systems, the default shell is Bash, which uses:
~/.bashrc
For many macOS systems, the default shell is Zsh, which uses:
~/.zshrc
These files are located in your home directory. By customizing the appropriate file, you can make terminal work easier with a highlighted interface, useful aliases, and customized paths.
Common Terminal Commands
This wiki is copied and adapted from a GitHub Gist by Brad Traversy.
Key Commands And Navigation
Before looking at common terminal commands, here are a few helpful keyboard shortcuts.
Up Arrow: show your previous command.Down Arrow: show your next command.Tab: auto-complete your command.Ctrl + L: clear the screen.Ctrl + C: cancel a command.Ctrl + R: search command history.Ctrl + D: exit the terminal.
Manual Pages
On Linux and macOS, the man command shows the manual page for a command:
man ls
If you are on Windows and using Git Bash, man may not be available. Instead, use --help after a command:
ls --help
Use the arrow keys or Page Up / Page Down to scroll. Press q to exit.
Information
whoami  # Show the current user
date    # Display the current date and time
File System Navigation
pwd                                  # Show the full path to the current directory
ls                                   # List directory contents
ls -a                                # List contents including hidden files
ls -l                                # List contents with details
ls -r                                # List contents in reverse order
cd                                   # Change to home directory
cd [dirname]                         # Change to a specific directory
cd ~                                 # Change to home directory
cd ..                                # Change to parent directory
cd -                                 # Change to previous directory
find [dirtosearch] -name [filename]  # Find a file by name
Modifying Files And Directories
mkdir [dirname]              # Make directory
touch [filename]             # Create file
rm [filename]                # Remove file
rm -i [filename]             # Remove file with confirmation
rm -r [dirname]              # Remove directory
rm -rf [dirname]             # Remove directory with contents
rm ./*                       # Remove everything in the current folder
cp [filename] [dirname]      # Copy file
mv [filename] [dirname]      # Move file
mv [dirname] [dirname]       # Move directory
mv [filename] [filename]     # Rename file or folder
mv [filename] [filename] -v  # Rename verbosely
You can also chain commands:
cd test2 && mkdir test3
Reading And Editing Files
Common command-line text editors include vim / vi, emacs, and nano.
To edit a file with Vim:
vim filename
Each editor has its own commands. If you get stuck, these shortcuts exit without saving:
- Vim: press
Escto enter command mode, then type:q!. - Emacs: type
Ctrl + X, thenCtrl + C. - Nano: type
Ctrl + X.
Reading Files Without Editors
cat [filename]       # Display file contents
less [filename]      # Scroll through a file; press q to exit
head [filename]      # Display the first 10 lines
head -n 5 [filename] # Display the first 5 lines
tail [filename]      # Display the last 10 lines
tail -n 15 [filename]# Display the last 15 lines
The Grep Command
grep locates a keyword in one file or many files. It is especially useful when you are looking for a function, line of code, or setting inside a directory.
grep [keyword] [filename]  # Find where keyword appears in a file
grep [keyword] -r *        # Find where keyword appears in the current directory
The Find Command
Use find to check whether a file exists inside a directory:
find [directory] -name [filename]
Conclusion
You can do almost everything you do with a cursor in a terminal. When you are unsure, search for “how do I do xxx in a terminal” and try the command on a small test file or directory first.
Getting Started on Amarel
Amarel is the campus-wide computational cluster offered by Rutgers. This page collects the basic steps for getting access, connecting to the cluster, using compute nodes responsibly, and submitting your first jobs.
Access Requirements
RU Network Access
Amarel requires a Rutgers IP address. If you are connected through RUWireless or another Rutgers network, you should be able to connect directly. If you are off campus, connect to the Rutgers VPN first.
Requesting An Account
Request Amarel access through the Rutgers Amarel access request form. After access is approved, you will log in with your Rutgers NetID and password.
Connecting With SSH
Open a terminal and connect with:
ssh <NetID>@amarel-new.hpc.rutgers.edu
You will be prompted for your NetID password. If you want to avoid entering your password each time, set up SSH key-based login following the Rutgers/Amarel instructions.
SSH without password
Here is an instruction on how to skip entering password every time you log in.
Cluster Etiquette
When you first connect to Amarel, you are on a login node. Use login nodes only for light tasks such as editing files, organizing directories, checking jobs, and installing small user-space software.
Do not run large calculations on login nodes. For large output or data, use your scratch directory:
/scratch/<NetID>
Interactive Compute Node
For interactive work, request a compute node with srun:
srun --partition=main --mem=16G --time=5:00:00 --pty bash
You can adjust the partition, memory, and wall time. Use sinfo to see available partitions.
If you get disconnected from an interactive session, check your running jobs:
squeue -u $USER
Then reconnect to the node shown in the queue:
ssh <NodeName>
For repeated or production calculations, use a submission script instead of interactive sessions.
Useful Cluster Commands
Check available partitions and nodes:
sinfo
This reports partition name, availability, time limit, node state, and node list. The partition name is what you use when submitting jobs.
Check detailed resources for a partition:
sinfo -N -p <partition_name> -o "%N %c %m %G %t"
This shows node name, CPU cores, memory, GPU resources, and state.
To request specific nodes in a SLURM submission file, add:
#SBATCH --nodelist=nodename1,nodename2,nodename3
Software And Modules
Install personal packages in your home directory. You will not have permission to use system package managers such as yum or apt.
Before installing software yourself, check whether it already exists as a shared module. Add the community module directory to your ~/.bashrc:
module use /projects/community/modulefiles
List available modules:
module av
Load a module:
module load <name/version>
Load necessary modules inside your job submission file. Many default tools on login nodes, such as gcc and cmake, can be old, so look for newer versions through the module system.
Example SLURM Submission File
Save a file such as submit.sh:
#!/bin/bash
#SBATCH --partition=main
#SBATCH --job-name=jobname
#SBATCH --nodes=1
#SBATCH --ntasks=1
#SBATCH --cpus-per-task=8
#SBATCH --mem=12000
#SBATCH --time=10:00:00
#SBATCH --export=ALL
#SBATCH --requeue

# Threading limits
export OMP_NUM_THREADS=8
# export MKL_NUM_THREADS=1
# export OPENBLAS_NUM_THREADS=1

# Load Python environment
module purge
module load gcc
source ~/.bashrc
conda activate <YourCondaEnv>

# The command to run
srun python main.py
Submit the job with:
sbatch submit.sh
Getting Technical Support
First try searching online or asking group members. If the issue still needs IT support, send an email to help@oarc.rutgers.edu
Submitting Jobs on Amarel
Read the Amarel instruction page carefully before submitting your first job.
Installing Packages
Install personal packages in your home directory. You will not be able to use system package managers such as yum or apt on Amarel.
Loading Modules
Before installing a package, check whether it already exists in the shared modules. Amarel has different module directories. To access more shared modules, add this line to your ~/.bashrc:
module use /projects/community/modulefiles
Then list available modules:
module av
Load a module with:
module load <name/version>
Load all necessary modules in your job submission file. Many default packages on the login node, such as gcc and cmake, are quite old, so look for newer versions in the module system.
Useful Cluster Commands
Check available nodes:
sinfo
This prints information including:
PARTITION: the partition name you specify when submitting a job.TIMELIMIT: the maximum job time you can request.STATE: whether nodes are available.NODELIST: the specific nodes in the partition.
To request specific nodes in a submission file, add:
#SBATCH --nodelist=nodename1,nodename2,nodename3
Check resources for a partition:
sinfo -N -p $partition_name -o "%N %c %m %G %t"
This reports node name, number of cores, maximum total memory, number of GPUs, and node state.
Example Submission File
Save a file such as submit.sh:
#!/bin/bash
#SBATCH --partition=main,main-redhat
#SBATCH --job-name=jobname
#SBATCH --nodes=1
#SBATCH --ntasks=1
#SBATCH --cpus-per-task=8
#SBATCH --mem=12000
#SBATCH --time=10:00:00
#SBATCH --export=ALL
#SBATCH --requeue

# Threading limits
export OMP_NUM_THREADS=8
export MKL_NUM_THREADS=1
export OPENBLAS_NUM_THREADS=1

# Load Python environment
module purge
module load gcc
source ~/.bashrc
conda activate <YourCondaEnv>

# Run the job
srun python main.py
Submit the job with:
sbatch submit.sh
Group Node
We have one CPU and one GPU node on Amarel dedicated to the Sun Lab. The partition name and project name are shared inside the group. To be added to the group nodes, send a request to Chong.
To see the information of the nodes, type
sinfo -N -l -p <partition_name>
We also have 2TB storage under the path /projects/<project_name>.
Submitting Jobs to the group node
In your slurm submission script, set the partition name to the group nodes:
#SBATCH --partition=<partition_name>
Since both CPU and GPU nodes are under the same partition name, please specify the node to use in your script:
If your task does not need GPU, add the following line in your submission script:
#SBATCH --nodelist=halk0121
Else,
#SBATCH --nodelist=gpuk015
Making your own directory in the group storage
cd /projects/<project_name>
mkdir $YOUR_DIR_NAME
chgrp $(whoami) $YOUR_DIR_NAME
Note that the last line is important so that other people cannot make changes to your files.
Rules
- If you are not in hurry and the group node is full, use the free nodes on Amarel.
- Only use the GPU node when your job needs GPUs.
- The group project directory should be used to keep important files, scripts, and outputs. For temporary computation outputs, use
/scratch/. You can use this path to share files with the group members putting the files outside of your private directory.
Coding
Python Environments
Conda is a package and environment manager. It is useful for scientific computing because it can manage both Python versions and software dependencies.
Miniconda is a minimal installation of Conda. It is generally sufficient for research computing and avoids installing the large collection of packages included with Anaconda.
1. Install Miniconda
Go to the official Miniconda download page:
https://www.anaconda.com/docs/getting-started/miniconda/install
For a Linux machine, first check the CPU architecture:
uname -m
Typical results are:
x86_64
for an Intel/AMD machine, or
aarch64
for an ARM machine.
Download the appropriate Linux installer from the Miniconda website.
For example, on an x86-64 Linux machine:
wget https://repo.anaconda.com/miniconda/Miniconda3-latest-Linux-x86_64.sh
Run the installer:
bash Miniconda3-latest-Linux-x86_64.sh
Follow the prompts. When asked whether to initialize Miniconda, choose:
yes
After installation, close and reopen the terminal.
Check that Conda is available:
conda --version
You should see something similar to:
conda 25.x.x
2. Create a Conda Environment
Do not install research packages directly into the base environment.
Instead, create a separate environment for each project:
conda create -n my-project python=3.11
Here:
my-projectis the environment name.python=3.11specifies the Python version.
Conda will show the packages it plans to install. Enter:
y
to continue.
3. Activate the Environment
Activate it with:
conda activate my-project
The terminal prompt should change to something similar to:
(my-project) user@computer:~$
Check the Python interpreter:
which python
It should point somewhere inside your Miniconda installation, for example:
~/miniconda3/envs/my-project/bin/python
Also check the Python version:
python --version
4. Install Packages
Packages can be installed using Conda:
conda install numpy scipy matplotlib
You can search for a package with:
conda search numpy
You can also use pip inside a Conda environment:
python -m pip install some-package
A useful rule is:
Install as much as possible with Conda first. Use
pipafterward for packages that are unavailable or more conveniently installed through PyPI.
For example:
conda install numpy scipy matplotlib
python -m pip install torch-geometric
Avoid repeatedly alternating between conda install and pip install after the environment becomes complicated, since this can make dependency resolution harder.
5. List Environments
To see your Conda environments:
conda env list
For example:
base                  *  /home/user/miniconda3
my-project               /home/user/miniconda3/envs/my-project
The * indicates the currently active environment.
6. Leave and Return to an Environment
When finished working:
conda deactivate
Later, reactivate the environment with:
conda activate my-project
You do not need to recreate the environment each time.
7. Record the Environment
For reproducible research, save the environment configuration:
conda env export > environment.yml
The file contains information about the Python version and installed packages.
Another user can recreate the environment with:
conda env create -f environment.yml
Then activate it:
conda activate my-project
For a cleaner, more portable specification containing mainly the packages you explicitly requested, use:
conda env export --from-history > environment.yml
This is often preferable for sharing an environment between different computers or operating systems.
8. Remove an Environment
If an environment is no longer needed:
conda deactivate
conda env remove -n my-project
This removes the environment and its installed packages.
9. Use the Environment in VS Code
Open your project:
code .
In VS Code:
- Open the Command Palette with
Ctrl+Shift+P. - Search for
Python: Select Interpreter. - Select the interpreter associated with your Conda environment.
It should look similar to:
Python 3.11 ('my-project': conda)
You can verify the interpreter from the VS Code terminal:
which python
Recommended Workflow
For a new research project:
conda create -n my-project python=3.11
conda activate my-project

conda install numpy scipy matplotlib
Install any additional packages required by the project:
python -m pip install package-name
Record the environment:
conda env export --from-history > environment.yml
When returning to the project:
conda activate my-project
When finished:
conda deactivate
Important Rules
- Create a separate environment for each research project.
- Do not install project dependencies into the
baseenvironment. - Specify the Python version when creating an environment.
- Use Conda for major scientific dependencies when practical.
- Use
pipinside the activated environment when needed. - Save an
environment.ymlfile for reproducibility. - Before installing packages, check which environment is active:
conda env list
which python
Python Virtual Environment
A virtual environment creates an isolated Python installation for a project. It allows each project to have its own Python packages without interfering with other projects or the system Python.
1. Create a project directory
mkdir my-project
cd my-project
2. Check Python
python3 --version
For new projects, Python 3.11 or newer is generally a good choice.
On Ubuntu/Debian, if venv is not installed:
sudo apt install python3-venv
3. Create a virtual environment
Inside the project directory:
python3 -m venv .venv
This creates a directory called .venv containing an isolated Python environment.
Your project will look like:
my-project/
├── .venv/
└── ...
4. Activate the environment
source .venv/bin/activate
The terminal prompt will usually change to something like:
(.venv) user@computer:~/my-project$
Check which Python is being used:
which python
It should point to:
.../my-project/.venv/bin/python
5. Install packages
After activating the environment, install packages normally:
pip install numpy scipy matplotlib
For a PyTorch project:
pip install torch
Check installed packages:
pip list
A useful habit is to use:
python -m pip install numpy
instead of pip install numpy. This guarantees that pip belongs to the Python interpreter you are currently using.
6. Leave the environment
When finished:
deactivate
You do not need to delete or recreate the environment.
The next time you work on the project:
cd my-project
source .venv/bin/activate
7. Record dependencies
To save the packages used by a project:
pip freeze > requirements.txt
The project now contains:
my-project/
├── .venv/
├── requirements.txt
└── ...
Another user can reproduce the environment with:
python3 -m venv .venv
source .venv/bin/activate
pip install -r requirements.txt
8. Git
Do not commit .venv to Git.
Add it to .gitignore:
.venv/
Commit requirements.txt instead.
9. VS Code
Open the project directory in VS Code:
code .
Then select the virtual environment:
- Open the Command Palette with
Ctrl+Shift+P. - Search for
Python: Select Interpreter. - Select the Python interpreter inside
.venv.
It should look similar to:
./.venv/bin/python
VS Code will then use the packages installed in that environment.
Recommended Workflow
For every new Python project:
mkdir my-project
cd my-project

python3 -m venv .venv
source .venv/bin/activate

python -m pip install --upgrade pip
python -m pip install numpy scipy matplotlib
When returning to the project later:
cd my-project
source .venv/bin/activate
When finished:
deactivate
Important Rules
- Use one virtual environment per project.
- Do not install research packages into the system Python.
- Do not commit
.venvto Git. - Record project dependencies in
requirements.txt. - Before installing packages, check that the correct environment is activated:
which python
If it points inside your project’s .venv directory, you are using the correct environment.
Scientific Packages
VASP on Amarel
Getting VASP
You need to be added to a group license to use VASP. Once access is ready, extract the VASP tar file and place it in your Amarel home directory.
Example version:
VASP 6.5.0
Official installation wiki:
Environment Settings
Load the Intel module. Add these lines to your job submission script or to a module configuration file:
module purge
module load intel/oneapi_2022.3.1-sw1088
module load gcc
If you cannot find the Intel module, first use the larger community module library. Add this line to your ~/.bashrc:
module use /projects/community/modulefiles
If the environment is loaded successfully, you should have paths to the following commands:
which ifx
which ifort
which icx
which mpif90
which mpicc
Installing VASP
Do the following steps inside the VASP root directory. You should see subdirectories such as arch, bin, build, src, testsuite, and tools.
Copy the Intel OpenMP-compatible makefile.include:
cp arch/makefile.include.intel_omp ./makefile.include
Compile the standard VASP executable:
make std
Compilation will take a while. Once it finishes, check the bin directory:
ls bin
You should see:
vasp_std
For spin-orbit coupling calculations, compile the noncollinear executable:
make ncl
To build every target, use:
make all
You can accelerate compilation with parallelization:
make DEPS=1 -jN <target>
Here, N is the number of threads to use.
Add VASP To Your Path
Add the VASP bin directory to your ~/.bashrc:
export PATH=$VASP_ROOT/bin:$PATH
Here, $VASP_ROOT is the VASP root directory containing bin, src, and the other VASP subdirectories.
Test The Installation
From the VASP root directory, run:
make test
If the tests run successfully, your VASP installation is ready to use.
PyTorch on Amarel
These instructions create a PyTorch environment that runs on Amarel GPUs with CUDA 11.8. CUDA 11.8 is useful because some Amarel GPUs may not support CUDA 12.
Run the installation steps from a compute node, not from the login node.
Request A CPU Node
Request an interactive CPU session with 2 CPUs and 16 GB RAM for 1 hour:
srun --cpus-per-task=2 --ntasks=1 --mem=16G --time=01:00:00 --pty bash
Adjust CPUs, memory, and time as needed.
Create A Fresh Conda Environment
Unload any currently loaded CUDA module so you do not accidentally mix toolkits:
module unload cuda 2>/dev/null || true
Create and activate a clean environment:
conda create -n torch-cu118 python=3.10 -y
conda activate torch-cu118
Install PyTorch With CUDA 11.8
Use the PyTorch CUDA 11.8 pip wheels. This avoids many conda solver conflicts that can happen on HPC systems.
python -m pip install --upgrade pip
pip install --no-cache-dir torch==2.5.1 torchvision==0.20.1 torchaudio==2.5.1 --index-url https://download.pytorch.org/whl/cu118
Verify GPU Access
GPU verification should be done on a GPU node. Request one GPU for 30 minutes:
srun -p gpu --gres=gpu:1 --mem=16G --time=00:30:00 --pty bash
Activate the environment:
conda activate torch-cu118
Run this check:
python - <<'PY'
import torch

print("torch:", torch.__version__)
print("torch.version.cuda:", torch.version.cuda)
print("cuda available:", torch.cuda.is_available())

if torch.cuda.is_available():
    print("GPU:", torch.cuda.get_device_name(0))
    x = torch.rand(1024, 1024, device="cuda")
    y = x @ x.T
    print("ok:", float(y.sum()) > 0)
PY
If cuda available is True and the matrix multiplication finishes, the environment is working.
Save The Working Environment
After the environment works, save both conda and pip package information:
conda list --explicit > torch-cu118-spec.txt
pip freeze > requirements-cu118.txt
These files make it easier to recreate or debug the environment later.
Optional Run Script
You can create a small helper script called torchcu118_run to submit Python training jobs with the torch-cu118 environment.
Create ~/bin if it does not exist:
mkdir -p ~/bin
Create the file ~/bin/torchcu118_run with the following content. Replace <NetID> with your Rutgers NetID so SLURM email updates go to you.
#!/bin/bash

if [ "$#" -lt 1 ]; then
  echo "Usage: torchcu118_run script.py [script arguments...]"
  exit 1
fi

SCRIPT="$1"
shift

sbatch <<SBATCH
#!/bin/bash
#SBATCH --partition=gpu
#SBATCH --gres=gpu:1
#SBATCH --job-name=torch-cu118
#SBATCH --nodes=1
#SBATCH --ntasks=1
#SBATCH --cpus-per-task=4
#SBATCH --mem=16G
#SBATCH --time=24:00:00
#SBATCH --mail-type=END,FAIL
#SBATCH --mail-user=<NetID>@rutgers.edu
#SBATCH --export=ALL

module purge
source ~/.bashrc
conda activate torch-cu118

srun python "$SCRIPT" "$@"
SBATCH
Make the script executable:
chmod +x ~/bin/torchcu118_run
Make sure ~/bin is on your PATH. If needed, add this line to ~/.bashrc:
export PATH="$HOME/bin:$PATH"
Then reload your shell settings:
source ~/.bashrc
Submit A Training Job
Go to the directory containing your Python training script and run:
torchcu118_run <file>.py
Replace <file>.py with the actual name of your Python script.
You can adjust the requested runtime, memory, CPU count, and GPU count inside ~/bin/torchcu118_run. The maximum allowed runtime may depend on the partition policy.
Quantum ESPRESSO on Amarel
These notes describe how to set up and run Quantum ESPRESSO on Amarel.
Before doing setup or computational work, request an interactive compute session instead of working on the login node:
srun --cpus-per-task=2 --time=03:00:00 --pty bash
This requests 2 CPUs for 3 hours.
Add A QE Loader To Bash
Open your ~/.bashrc file:
nano ~/.bashrc
Add this function at the bottom:
# Load Quantum ESPRESSO environment on Amarel
function qeload() {
  module purge
  module use /projects/community/modulefiles
  module load intel/19.0.3
  module load QE/6.4.1_intel19.0.3-kholodvl
}
If you are using nano, press Ctrl + O, then Enter to save. Press Ctrl + X to exit.
Reload your shell settings:
source ~/.bashrc
Whenever you want to run Quantum ESPRESSO, load the environment with:
qeload
You can then run a QE input file manually:
pw.x -in inputfile.pwi | tee inputfile.pwo
Prepare Pseudopotentials
Quantum ESPRESSO needs access to the correct pseudopotential files, usually .UPF files.
Useful sources include:
For most jobs, place the pseudopotential files in a folder near your .pwi input files.
Use your scratch directory for computational work:
cd /scratch/<NetID>
Create a QE working directory and a pseudopotential directory:
mkdir -p qe/pseudo
cd qe
Upload the relevant .UPF files into:
/scratch/<NetID>/qe/pseudo
Make sure your .pwi input file points to the correct pseudopotential directory.
Optional Run Script
You can create a helper command called qe_run to submit QE input files to SLURM.
Create ~/bin if it does not exist:
mkdir -p ~/bin
Create ~/bin/qe_run with the following content. Replace <NetID> with your Rutgers NetID.
#!/bin/bash

if [ "$#" -lt 1 ]; then
  echo "Usage: qe_run inputfile.pwi"
  exit 1
fi

INPUT="$1"
BASENAME="${INPUT%.pwi}"

sbatch <<SBATCH
#!/bin/bash
#SBATCH --partition=main
#SBATCH --job-name=qe-${BASENAME}
#SBATCH --nodes=1
#SBATCH --ntasks=1
#SBATCH --cpus-per-task=2
#SBATCH --mem=8G
#SBATCH --time=24:00:00
#SBATCH --mail-type=END,FAIL,REQUEUE
#SBATCH --mail-user=<NetID>@rutgers.edu
#SBATCH --requeue
#SBATCH --export=ALL

source ~/.bashrc
qeload

pw.x -in "$INPUT" | tee "${BASENAME}.pwo"
SBATCH
Make the script executable:
chmod +x ~/bin/qe_run
Make sure ~/bin is on your PATH. If needed, add this to ~/.bashrc:
export PATH="$HOME/bin:$PATH"
Then reload:
source ~/.bashrc
Submit A QE Job
Go to the directory containing your .pwi file:
cd /scratch/<NetID>/qe
Submit the job:
qe_run <filename>.pwi
The script submits the job to the queue and sends email updates when the job ends, fails, or is requeued. If a job is preempted, SLURM can requeue it and run it again when resources become available.
Gaussian on Amarel
These notes describe a clean workflow for running Gaussian jobs on Amarel.
One-Time Setup
Put Gaussian helper scripts in your personal ~/bin folder.
If you do not already have a bin folder, create one and add it to your PATH:
cd ~
mkdir -p ~/bin
echo 'export PATH="$HOME/bin:$PATH"' >> ~/.bashrc
source ~/.bashrc
Then move into the folder:
cd ~/bin
Create or upload the Gaussian submission helper script named:
g16_run
If you copied the script from a Windows-formatted file and it gives line-ending errors, convert it to Unix line endings:
sed -i 's/\r//' g16_run
Make the script executable:
chmod +x g16_run
Open g16_run and replace any placeholder NetID, email address, name, or account information with your own information.
Work In Scratch
Use your scratch directory for Gaussian calculations:
cd /scratch/<NetID>
Create a project folder if needed:
mkdir -p gaussian
cd gaussian
Request An Interactive Session
Do not run calculations on the login node. Request an interactive compute session before preparing or testing jobs:
srun --cpus-per-task=2 --time=03:00:00 --pty bash
This requests 2 CPUs for 3 hours. Adjust CPU count and runtime as needed. The maximum runtime depends on the partition policy.
Load Gaussian
Load Gaussian before running jobs:
module load gaussian
You can check whether GaussView is available with:
gv
If Gaussian is not loaded correctly, output files such as .chk and .log may not be written properly.
Submit A Gaussian Job
Gaussian input files should be saved as .com files.
Submit a job with:
g16_run <filename.com>
Replace <filename.com> with the actual Gaussian input file. The job should produce a .log output file and a .chk checkpoint file.
Monitor And Cancel Jobs
Check your running jobs:
squeue -u <NetID>
Cancel a job:
scancel <jobID>
Editing Input Files
You can edit .com files locally and upload them, or edit them directly on Amarel.
To edit with vi:
vi <filename.com>
Basic vi reminders:
- Press
ito enter insert mode. - Press
Esc, then type:wto save. - Press
Esc, then type:wqto save and quit. - Press
Esc, then type:q!to quit without saving.
File Safety Tips
- Temporary
.outfiles andGau*files can usually be deleted after jobs finish. - Do not delete
.com,.chk, or.logfiles unless you are certain they are no longer needed. - Always save Gaussian input files from GaussView as
.comfiles. - Avoid editing
.logfiles in a way that saves accidental changes. - Do not clean up temporary Gaussian files while related jobs are still running.
Useful Tools
Using GitHub
We use Git for version control and GitHub for sharing code, collaborating on projects, and keeping track of changes.
When you are unsure what to do, search online first and check the state of your repository before running commands that modify files.
Git Commands
To get started, you will need the following commands.
Basics
Initialize a Git repository in the current directory:
git init
This creates a .git tracker, and your directory becomes a repository.
Stage a file:
git add FILE_NAME
Create a commit:
git commit -m "MESSAGE"
After you stage files, this command creates a timestamped commit containing the tracked changes.
Check repository status:
git status
This shows your current branch, modified files, and staged files.
Show previous commits:
git log
Show unstaged changes:
git diff
Show unstaged changes for one file:
git diff FILE_NAME
Branches
Sometimes you already have a good version of a package, but you want to add features without disturbing the current working version. The best practice is to start a new branch.
Show all branches:
git branch
Switch to an existing branch:
git checkout BRANCH_NAME
Create a new branch from your current branch and switch to it:
git checkout -b BRANCH_NAME
GitHub Basics
Create a GitHub account:
Set up your account locally:
git config --global user.name "Your Name"
git config --global user.email "you@example.com"
Add SSH keys to your GitHub account:
Generating a new SSH key and adding it to the ssh-agent
Clone a repository to your local device or server:
Basic Workflow
git status
git pull
git checkout -b feature/my-change
git add .
git commit -m "Describe the change"
git push
Prefer small commits with clear messages.
Using VSCode with Amarel
Author: Laurence Giordano and Chelsea Sisule
Visual Studio Code, usually called VSCode, is a handy editor for coding. With the Remote SSH extension, you can edit files on Amarel from your local computer while using the VSCode interface.
Before setting this up, configure password-free SSH for Amarel. See Terminal Basics and Getting Started on Amarel for terminal and SSH background.
Install VSCode
Install Visual Studio Code.
Some newer versions of VSCode may not connect cleanly to Amarel. Version 1.88 from March 2024 has worked, and version 1.96 from November 2024 has also worked.
Before setting up Remote SSH, turn off automatic updates so VSCode does not update itself into an incompatible version:
- Open VSCode.
- Click the gear icon in the lower-left corner.
- Choose
Settings. - Search for
Update. - Disable automatic updates, or set updates to manual.
Install Remote SSH Extensions
Open the Extensions panel in VSCode and install:
Remote - SSHRemote ExplorerRemote - SSH: Editing Configuration Files
Connect To Amarel
Open the command palette:
- Windows and Linux:
Ctrl + Shift + P - macOS:
Cmd + Shift + P
Search for and select:
Remote-SSH: Connect to Host
Enter your Amarel SSH command using your own NetID:
ssh <NetID>@amarel.rutgers.edu
VSCode may ask which SSH configuration file to use.
On Windows, choose a path like:
C:\Users\<you>\.ssh\config
On macOS and Linux, choose:
~/.ssh/config
If VSCode asks for the remote platform, choose Linux. If there is a host key prompt, accept it.
After setup, connect through:
Remote-SSH: Connect to Host -> amarel.rutgers.edu
Add Amarel Folders To Your Workspace
After connecting to Amarel, add folders to your VSCode workspace:
File -> Add Folder to Workspace
VSCode will usually start in your Amarel home directory. You can add your home directory, project directory, or scratch directory depending on what you are working on.
Using Overleaf
LaTeX is a convenient tool for scientific writing, especially when you need to insert lots of equations. Overleaf is an online LaTeX editor that allows multiple users to write together. Our group uses Overleaf to
- Keep project notes
- Write manuscripts
Overleaf Premium Account
Faculty, staff and grad students from SAS can get the Overleaf premium feature. Follow this website to get your Premium account.
If you already have an Overleaf account, simply link your Rutgers email to it:
Click on the three dots by the Account on the lower left corner -> choose Account settings -> Choose Add another email and put your Rutgers email in.
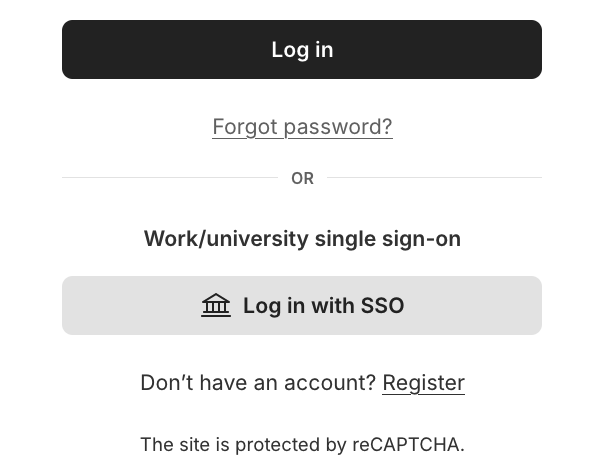
When logging in, use the SSO option
Start A Project
Click on New Project on the upper left corner, put your project name in, and you will start an Overleaf project. The main file is usually called main.tex.
This creates a default article document, and you can put your content in between \begin{document} and \end{document}.
The default document looks like this if your title is “test”:
\documentclass{article}
\usepackage{graphicx} % Required for inserting images

\title{test}
\author{Chong Sun}
\date{July 2026}

\begin{document}

\maketitle

\section{Introduction}

\end{document}
You should insert your content after \maketitle.
Here is a short 101 for writing with LaTex.
Compliling
Simply type CTRL + s, or click Recompile to see the PDF.
Templates
You might have noticed that the default LaTeX article looks not so pretty. For journal articles, there are usually Overleaf templates. Here is an imcomplete list:
- American Chemical Society Journals
- American Physical Society Journals
- AIP Publishing Journals
- Springer Nature
- Science
You can also find other templates that are useful.
Sections And Text
Use section commands to organize the document:
\section{Main Section}
\subsection{Subsection}
\subsubsection{Smaller Subsection}
Use a blank line to start a new paragraph.
Inline And Display Equations
Use single dollar signs for inline equations:
The energy is $E = mc^2$.
Use an equation environment for displayed equations:
\begin{equation}
E = mc^2
\end{equation}
Use align for multiple aligned equations:
\begin{align}
H\psi &= E\psi \\
\rho(\mathbf{r}) &= |\psi(\mathbf{r})|^2
\end{align}
Add A Figure
Upload the figure file to Overleaf, then include it with \includegraphics.
\begin{figure}
  \centering
  \includegraphics[width=0.65\textwidth]{figure.png}
  \caption{A short description of the figure.}
  \label{fig:example}
\end{figure}
Reference the figure in text:
Figure~\ref{fig:example} shows the main result.
A Complete Example
\documentclass{article}

\usepackage{graphicx}
\usepackage{amsmath}

\title{A Short LaTeX Example}
\author{Your Name}
\date{\today}

\begin{document}

\maketitle

\section{Introduction}

This is a short Overleaf example with an equation and a figure.

\begin{equation}
E = mc^2
\end{equation}

\begin{figure}
  \centering
  \includegraphics[width=0.65\textwidth]{figure.png}
  \caption{Example figure.}
  \label{fig:example}
\end{figure}

Figure~\ref{fig:example} shows an uploaded image.

\end{document}
Common Tips
- Every opening brace
{needs a closing brace}. - Every
\begin{...}needs a matching\end{...}. - Figure filenames should avoid spaces.
- If the PDF does not update, check the error message near the failed line number.
Miscellaneous
Getting Technical Help
Rutgers IT Help
For IT-related help, go to the SAS IT website, click Submit a Request, and fill out the request form.
Amarel Help
For Amarel-related help, email: help@oarc.rutgers.edu